Campaigns are sent from your restaurant's own domain, so guests see an address they recognise and inboxes can check that it really comes from you. You set it up once.
Where to find it
Connect your domain#
- 1
Enter your domain
Usually your website's domain. A subdomain such as news.yourrestaurant.co.uk works too. Gmail, Outlook and TableGo addresses can't send marketing.
- 2
Choose how campaigns appear
Sender name: what guests see in their inbox, usually your restaurant's name. From address: the part before the @, such as news; no inbox is needed. Reply-to email: where guests' replies go; Gmail or Outlook is fine.
- 3
Click Continue to DNS setup
TableGo prepares the records for your domain; this takes a few seconds.
You should see: The DNS records to add are shown.
Add the DNS records#
Add each record exactly as shown where your domain's DNS is managed: usually your domain registrar, your website host or Cloudflare. Host is the name to type at most providers; the full name is shown under it. Copy all records copies the ones still to add.
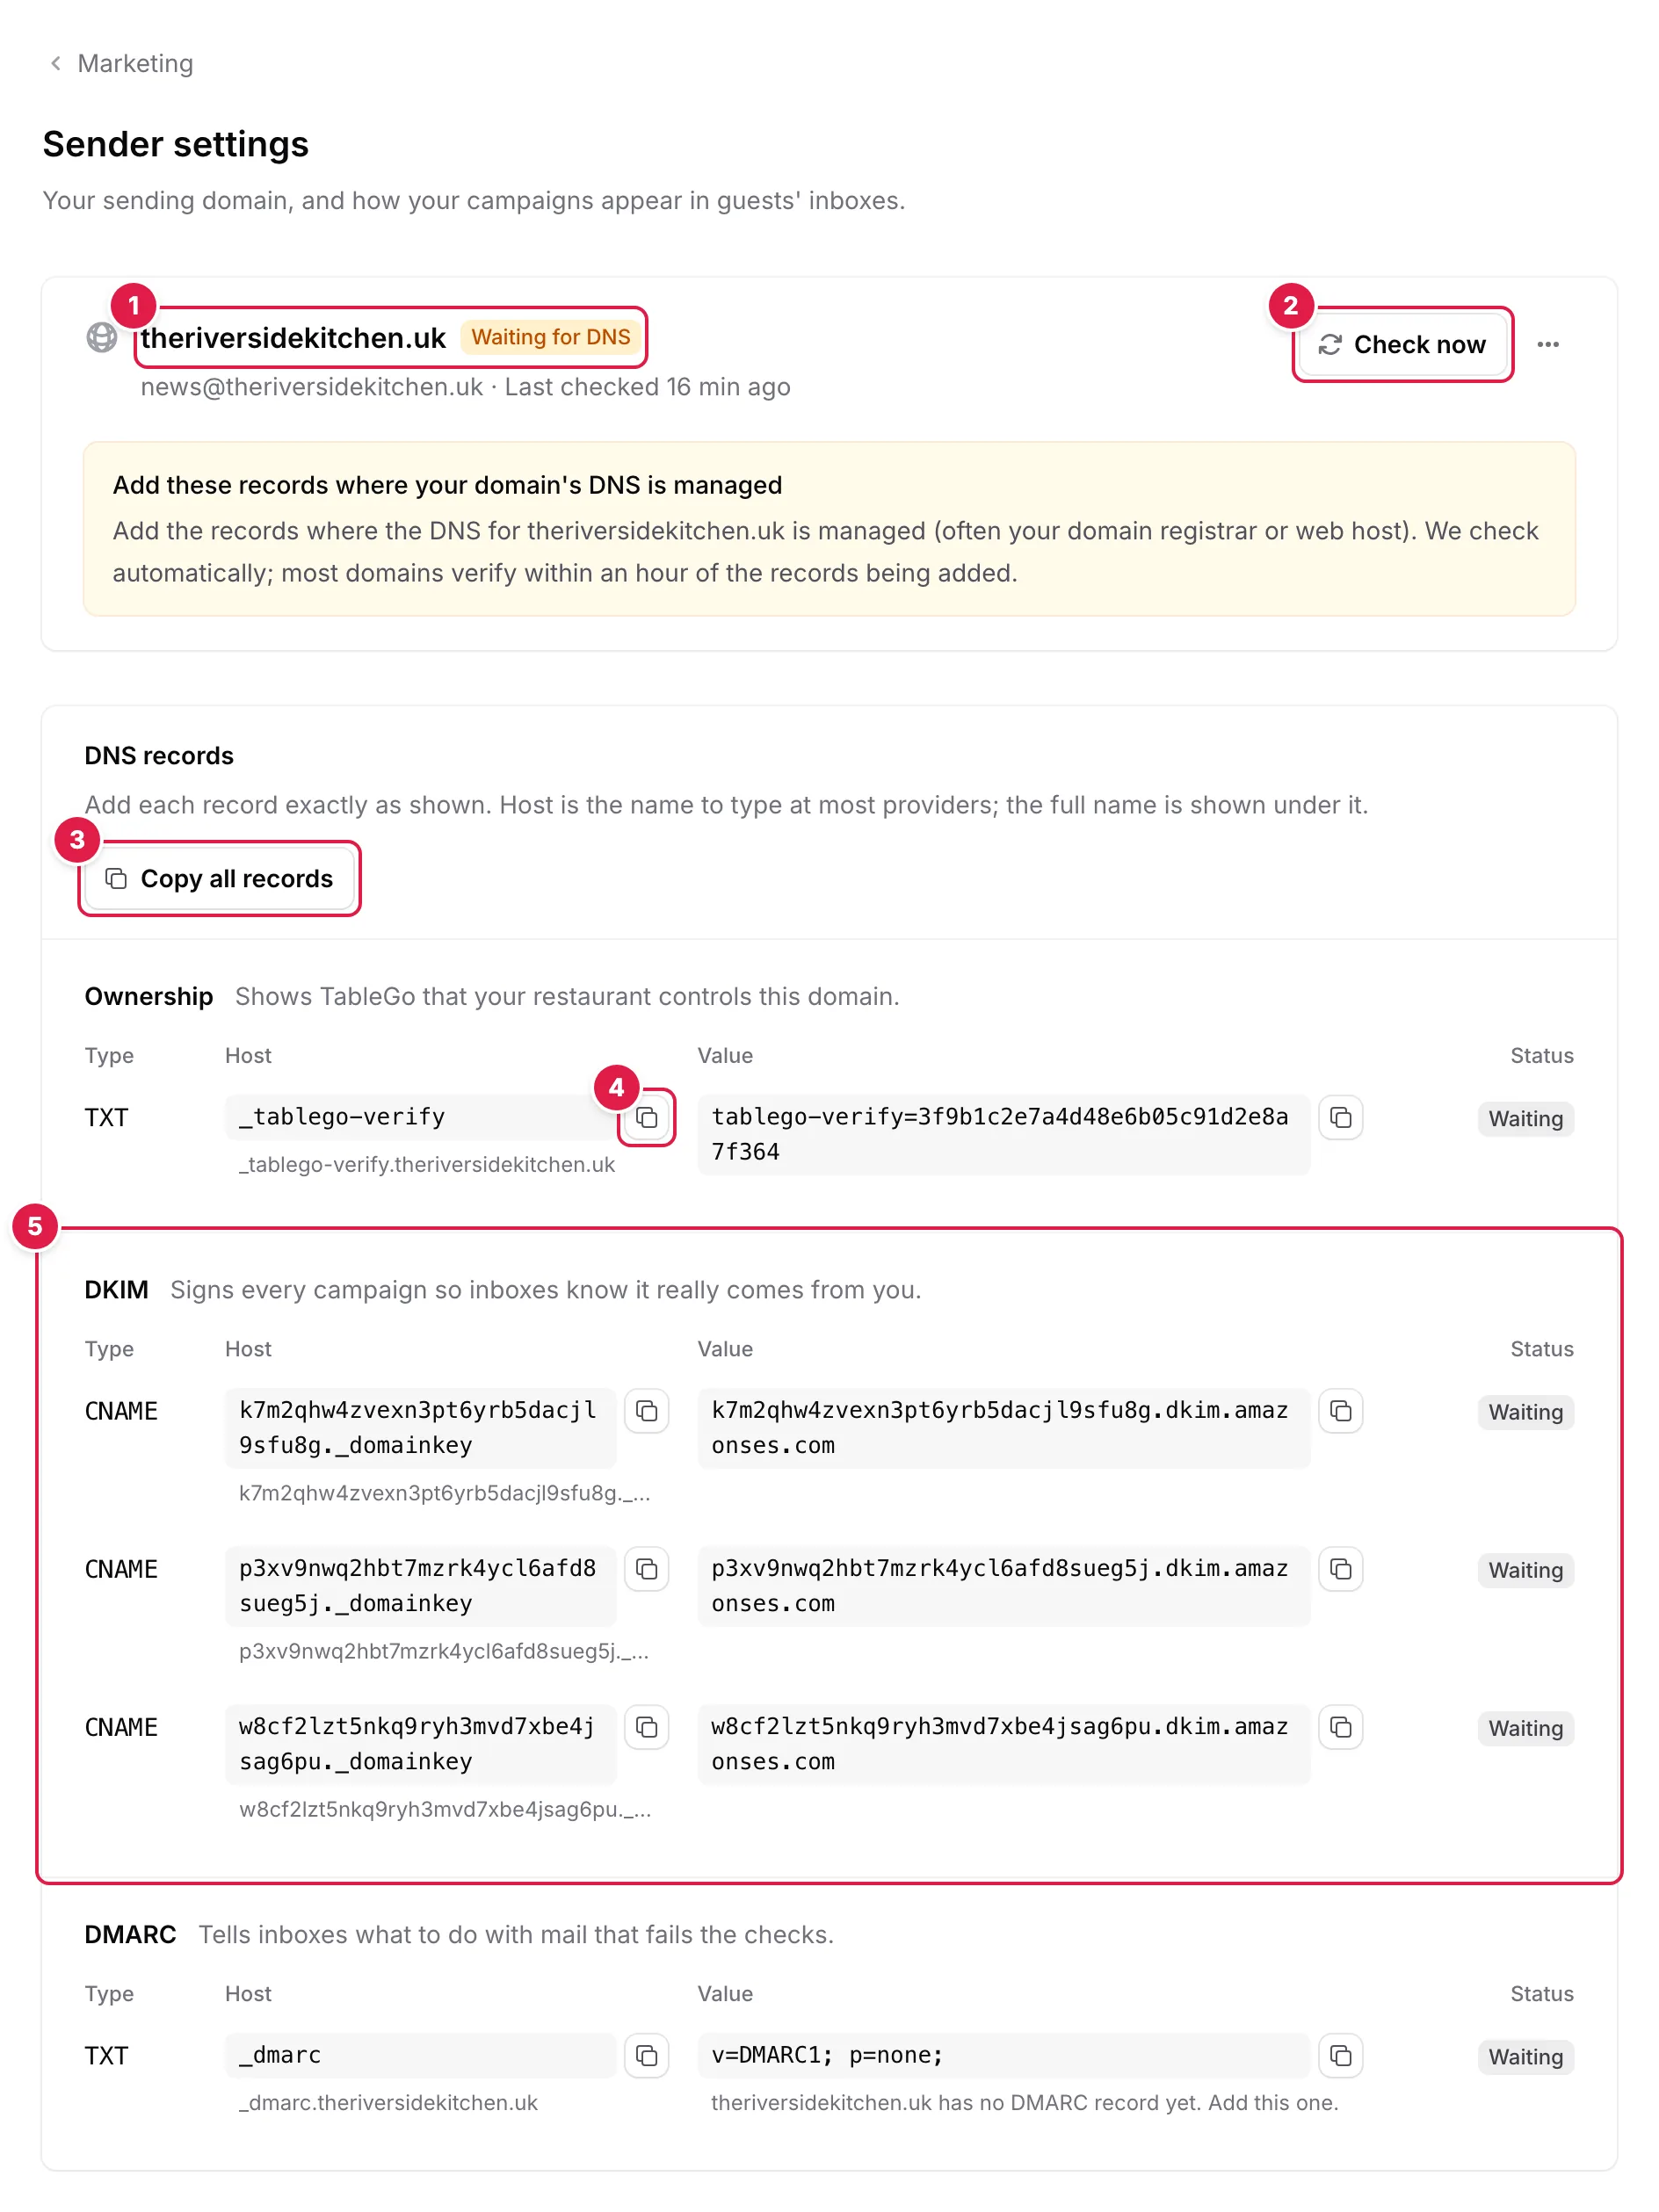
- Your domain stays Waiting for DNS until every record is found
- Check now, or let TableGo check automatically
- Copy all records to paste them into your DNS provider
- Or copy each Host and Value on its own
- DKIM: three CNAME records that sign your campaigns
- Ownership — a TXT record that shows TableGo your restaurant controls the domain. Not needed when you already send from the domain for another of your venues
- DKIM — CNAME records that sign every campaign, so inboxes know it really comes from you
- DMARC — a TXT record that tells inboxes what to do with mail that fails the checks. Only if your domain doesn't have one yet; if it does, keep it as it is
Tip
TableGo checks the records automatically and the page updates on its own. Most domains verify within an hour of the records being added; click Check now to check again straight away. Each record shows Verified, Waiting or Not found.
Important
When it's ready#
Sender settings shows Ready to send, with the name and address your campaigns go out as. If the DKIM records aren't found within 72 hours, it shows We couldn't verify this domain: check the records, then contact support and we'll restart the check.
If another TableGo account already uses your domain, a person at TableGo confirms that your restaurant may send from it too, and Sender settings says so while they do.
Postal address#
Every campaign's footer shows your restaurant's name and postal address, as the law requires. It's your business address from Basic Information, so change it there. Campaigns can't be sent until the street address, town or city and postcode are all filled in.
Change the sender later#
Change the sender name, from address or reply-to email in Sender settings at any time, then click Save. If your reply-to address doesn't seem to accept email, Sender settings asks you to change it, so guests' replies reach you.
To send from another domain, choose Use a different domain from the … menu. Scheduled campaigns keep the sender they were approved with; new ones wait until the new domain is verified.