A campaign is one email to a group of your guests. Write it, test it, then approve it: it goes out straight away or at the time you choose.
Where to find it
Start a campaign#
- 1
Click New campaign
Give it a name only your team sees, for example Autumn menu launch.
- 2
Pick a starting point
Announcement (news, a new menu or opening hours, led by your photo), Offer, Event, Plain letter, or Start from scratch. You can change, move or remove every part of it.
- 3
Click Create campaign
New campaigns go to all your subscribers until you choose another audience.
You should see: The campaign opens as a Draft. Every change saves automatically.
Complete each row#
The campaign page has a row for each part, ticked once it's complete; Edit opens it. Review and send is ready when every row is ticked.
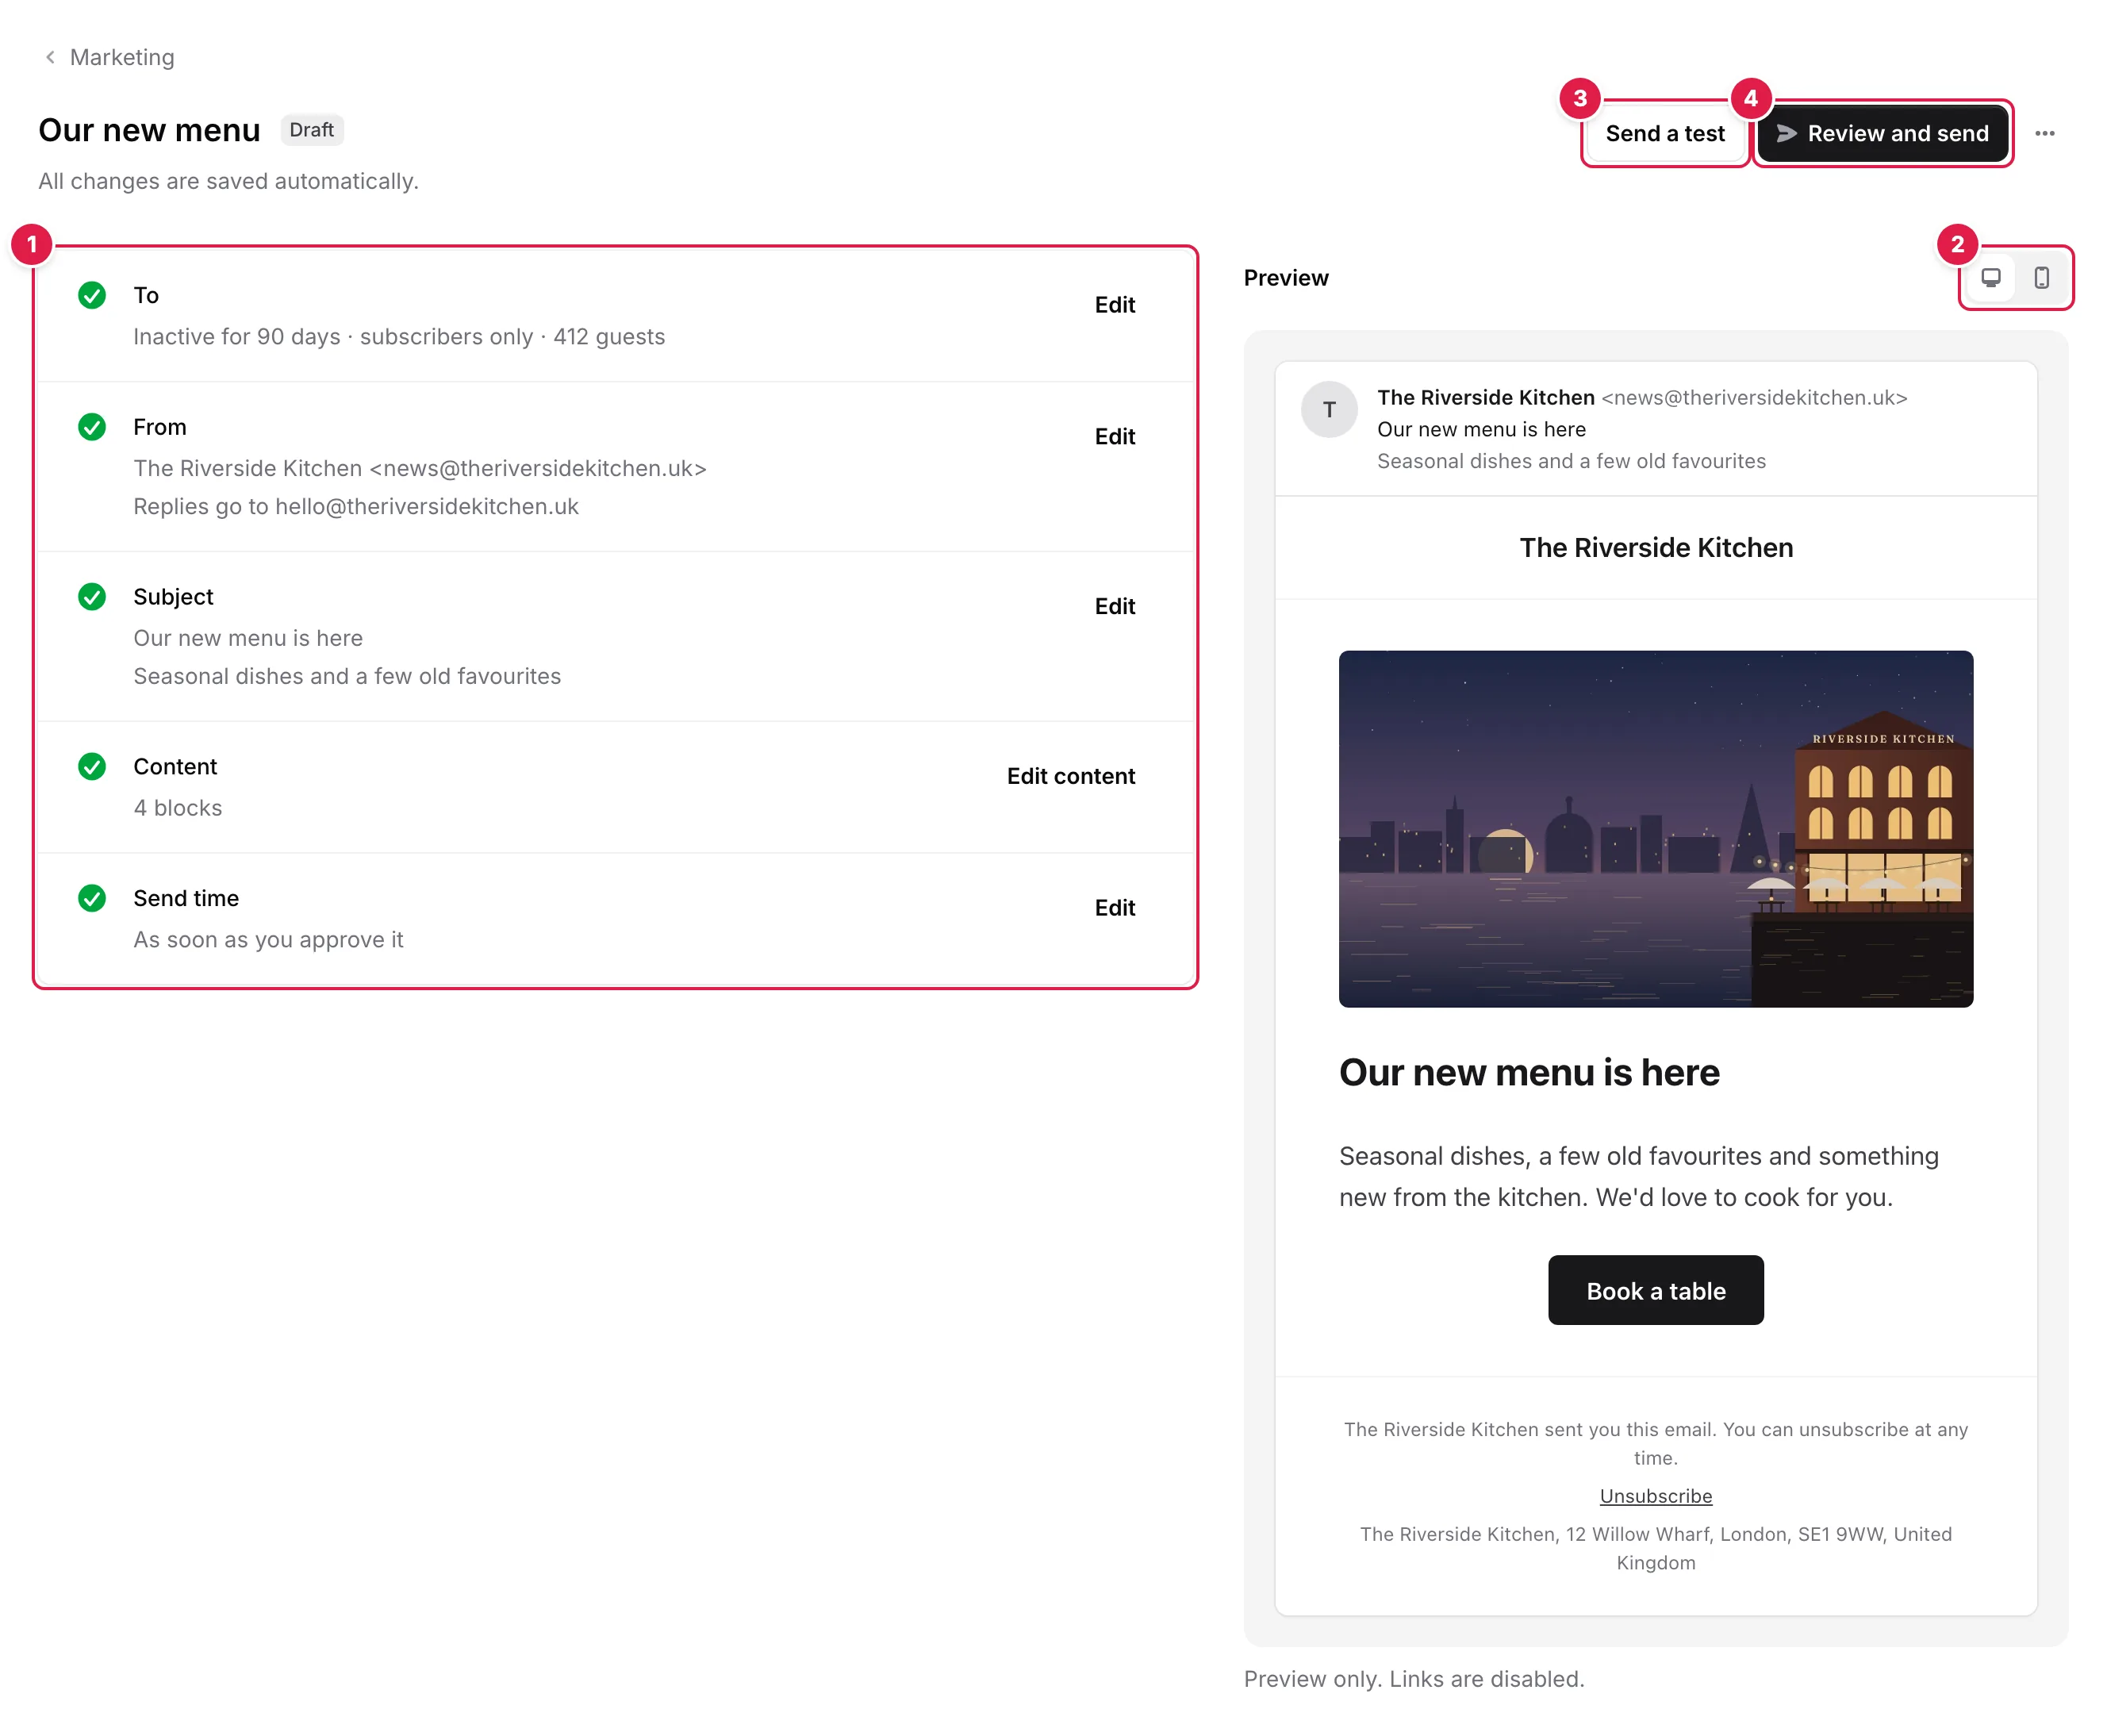
- Each row is ticked once it's ready; Edit opens it
- Preview the email at desktop or phone width
- Send a test: see it in your own inbox first
- Review and send: check who, from whom and when
- To — who gets it: all your subscribers, or a group by booking history or guest tags
- From — your sender name and address, and where replies go, from Sender settings
- Subject — up to 150 characters; phones show about the first 40. Add preview text too, shown after the subject in most inboxes
- Content — the email itself, built from blocks
- Send time — as soon as you approve it, or at a set date and time in your restaurant's time
Build the email#
Click Edit content. Add blocks with Add block, then move, duplicate or remove any of them:
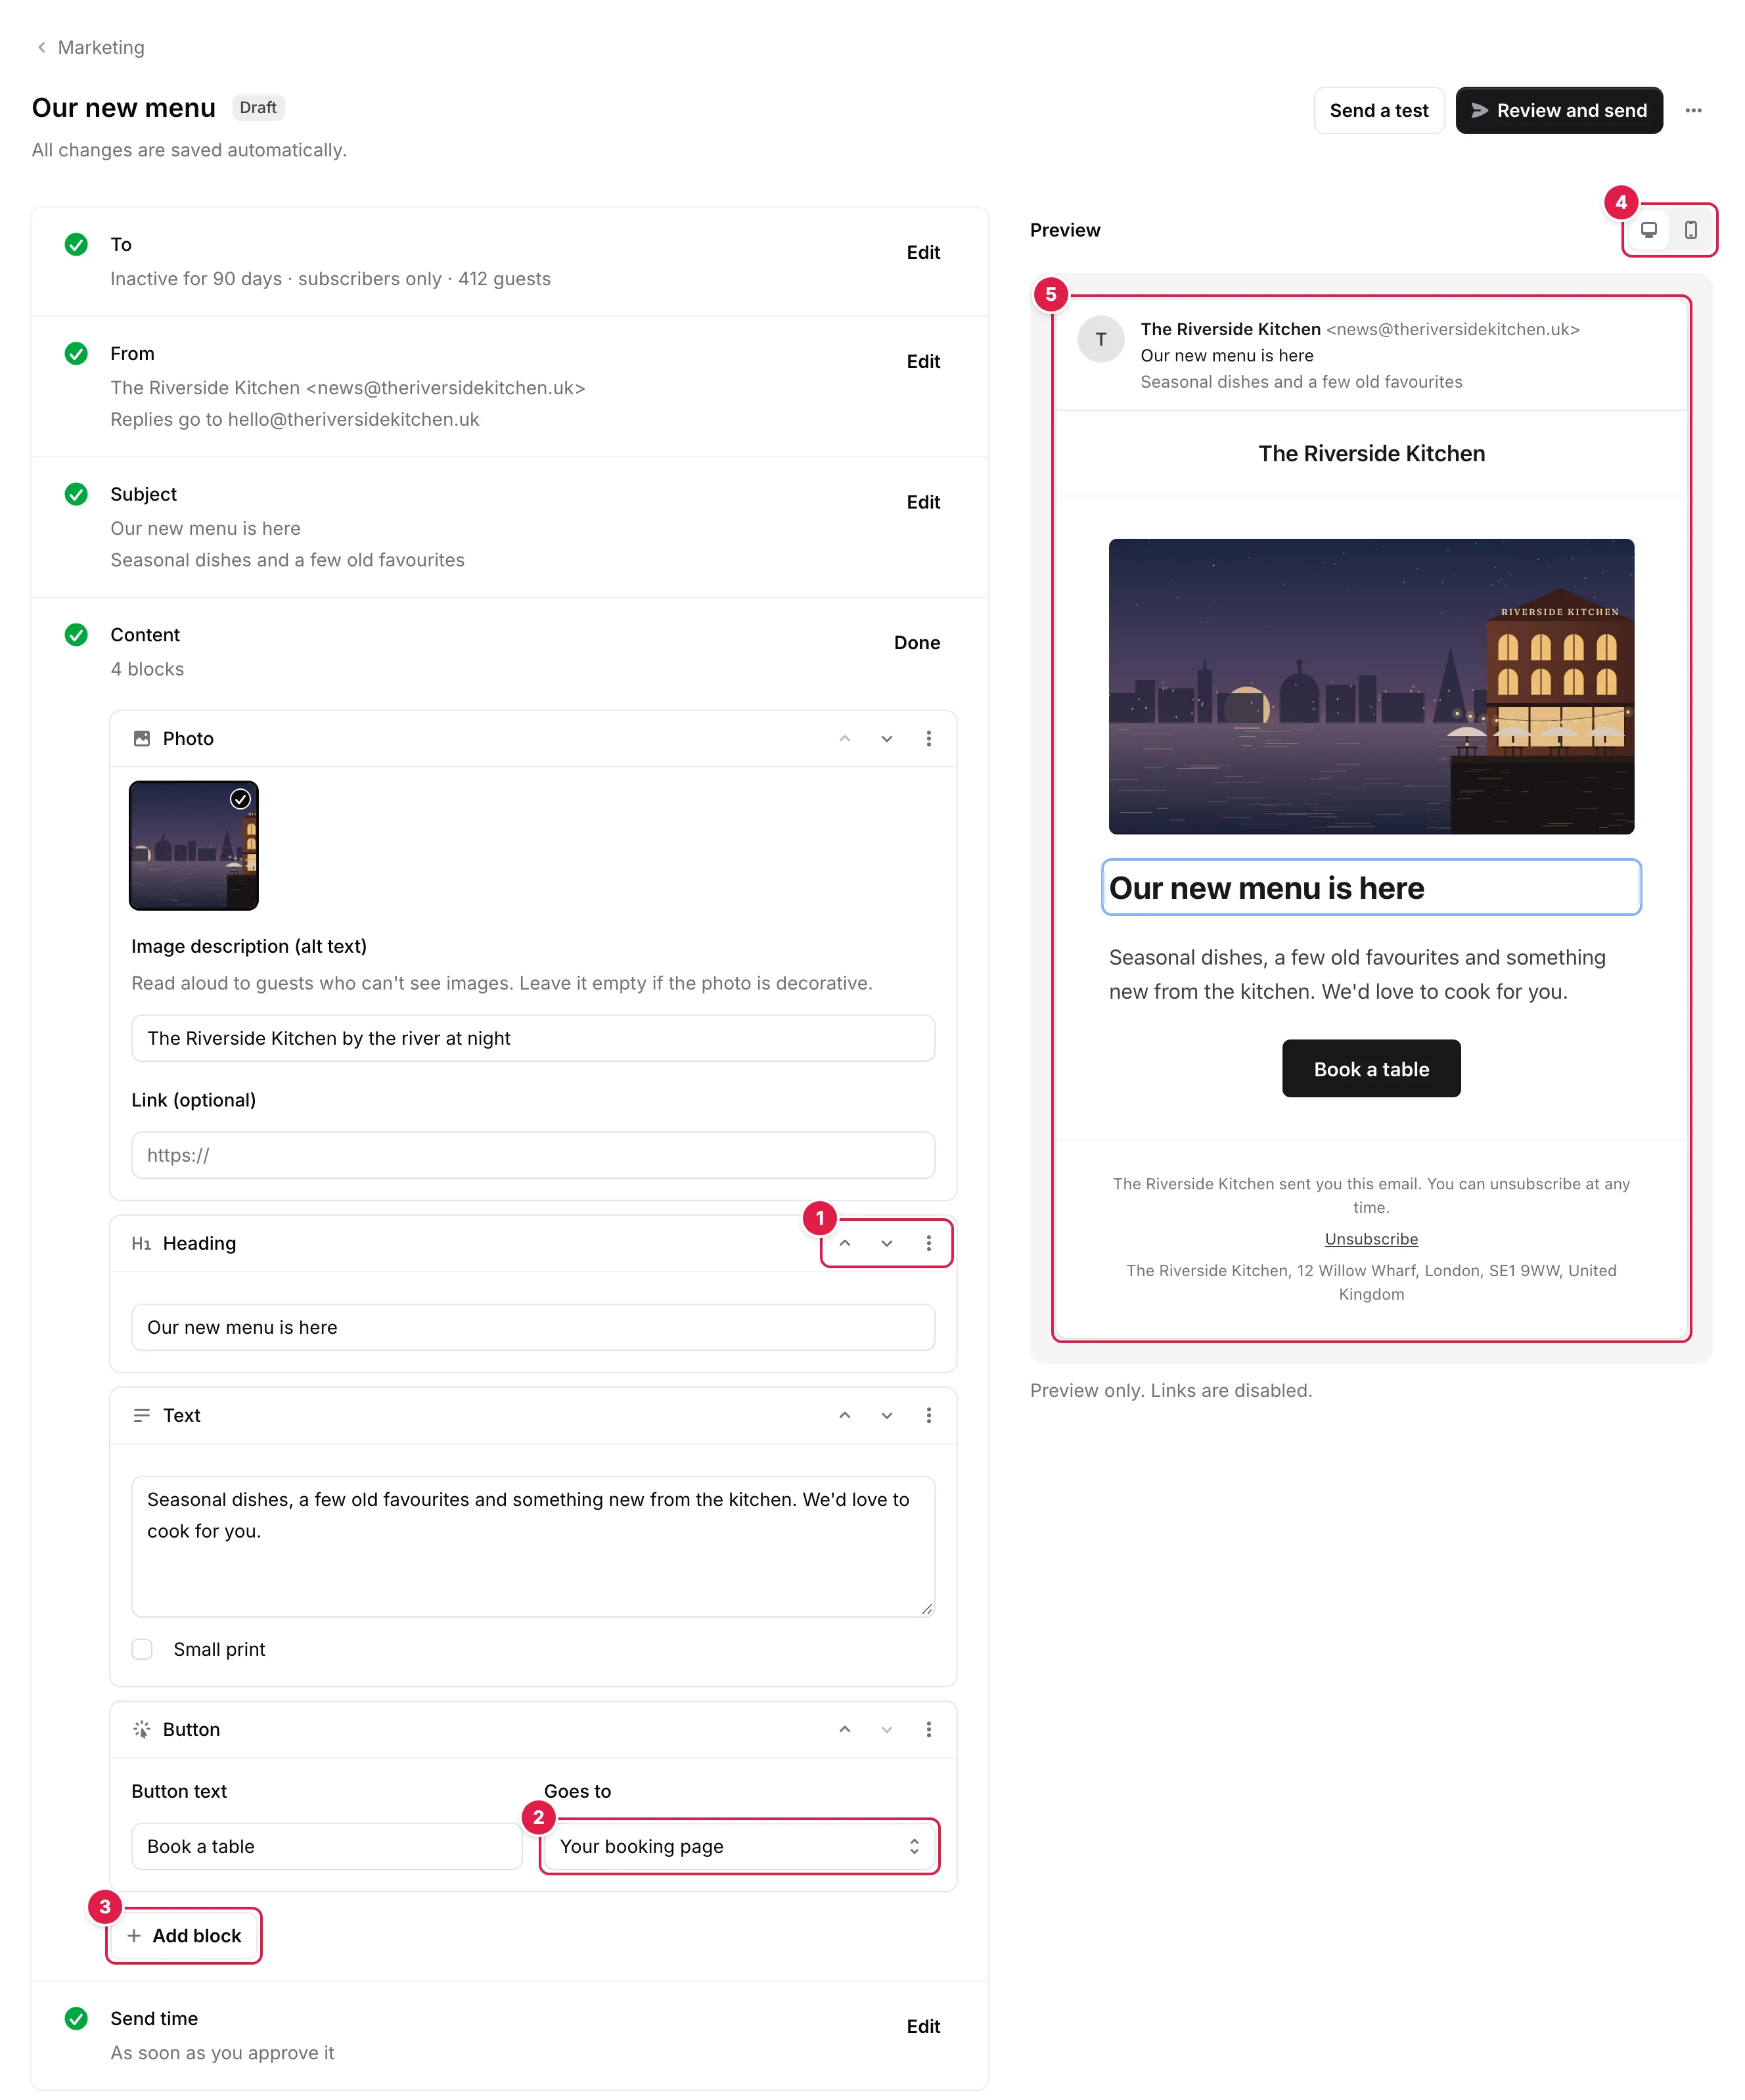
- Move a block up or down; ⋮ has Duplicate and Remove
- Goes to: your booking page, your website or another link
- Add block: Heading, Text, Photo, Button, Offer or event box, Divider
- Preview at desktop or phone width
- Preview: the block you're editing is outlined
- Heading — a short, bold line
- Text — a paragraph or two. Tick Small print for terms and conditions
- Photo — one of your restaurant's photos from Gallery, with a description read aloud to guests who can't see images
- Button — links to your booking page, your website or any page starting with https://
- Offer or event box — an offer or event in a box, with a button
- Divider — a thin line between sections
The preview shows the email as guests will see it. Every campaign gets your postal address and its own unsubscribe link in the footer.
Send a test#
Click Send a test to see the email in a real inbox before guests do. Enter up to 5 addresses, separated by commas: they must be your team's sign-in addresses. Tests have [Test] before the subject and don't count towards your allowance. You can send them once your domain is verified, up to 10 a day.
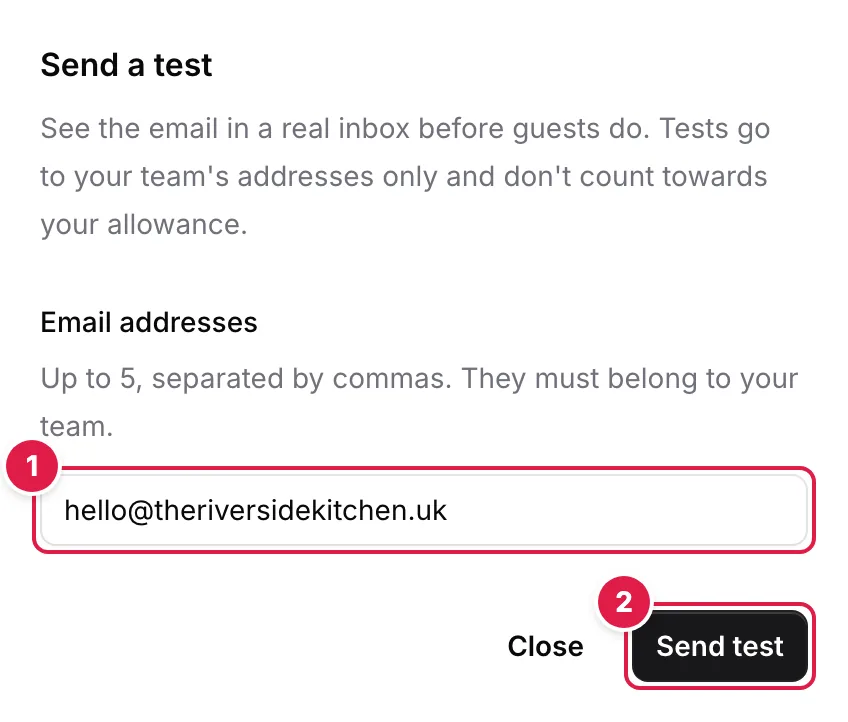
- Email addresses: up to 5 of your team's, separated by commas
- Send test: tests don't count towards your allowance
Approve and send#
- 1
Click Review and send
Check who it goes to, the sender, the subject, when it sends and how many emails you have left this month.
- 2
Click Send to … guests, or Schedule for … guests
Only Owners and Managers can approve a campaign.
You should see: The email, the sender and the recipient list are fixed. The campaign shows Scheduled, then Sending, then Sent.
At sending, anyone who has opted out since, no longer fits the audience or was emailed by you in the last 72 hours is skipped. Nobody is added after you approve.
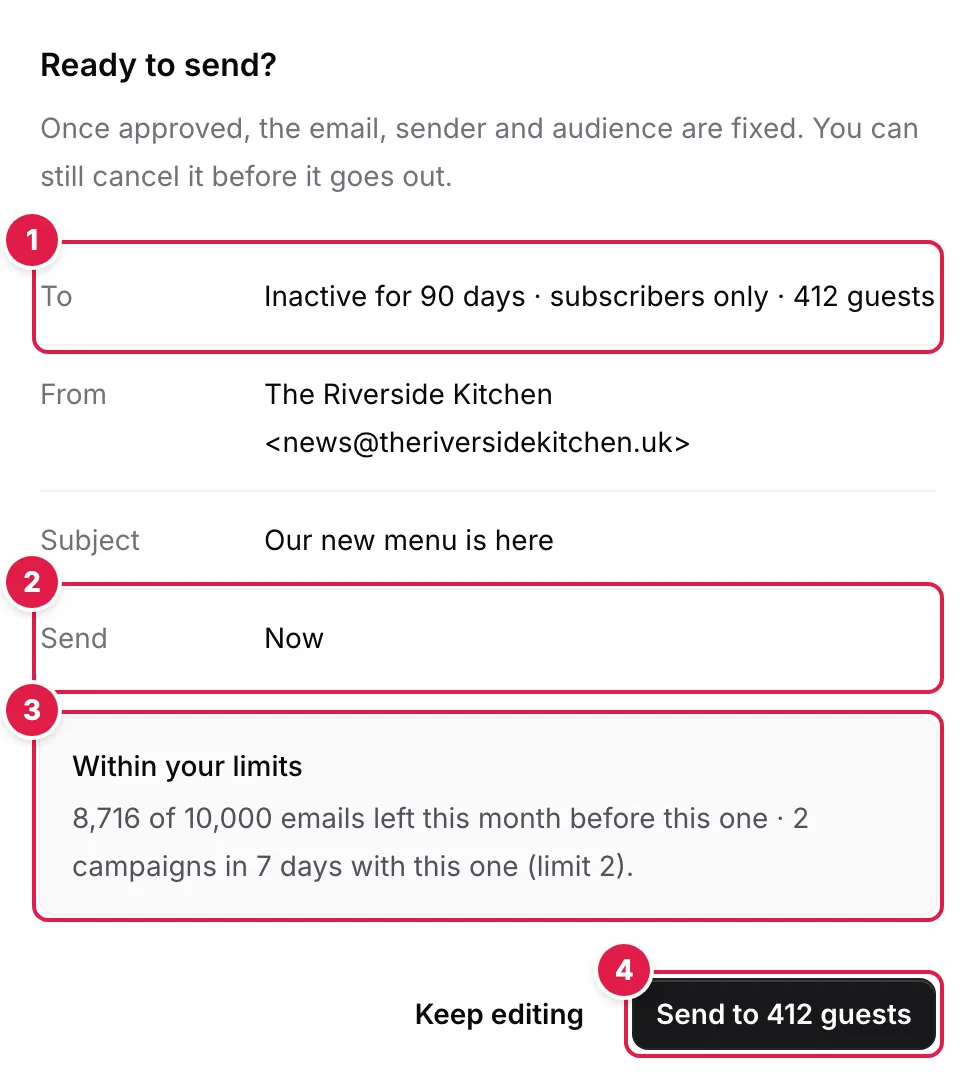
- To: the audience and how many guests get it
- Send: now, or the time chosen in Send time
- Within your limits: emails left this month, campaigns in 7 days
- Send to 412 guests approves it and sends it
Change or cancel#
- Scheduled — click Edit to take it back to a draft, or Cancel campaign
- Sending — Cancel campaign stops it. Nobody else receives it, and the emails not sent go back into your monthly allowance
- Paused — sending stopped, for example because TableGo paused sending or your sender needs attention. It stays paused until you click Resume, or cancel it
- Needs review — something changed before it could go out. Edit it, then review and send it again